

How To Add New Weather Stripping Around Door
How to Install Weather condition Stripping on Your Door
Easy-to-install kits make it easy to stop drafts.
![]() Time
Time
An 60 minutes or less
![]() Complexity
Complexity
Beginner
![]() Price
Price
Less than $20
Introduction
Stop free energy-wasting air leaks around entry doors by installing a weatherstripping kit.
Tools Required
Materials Required
- Door sweep
- Vinyl bulb for door sill
- Weatherstrip kit
Project step-past-step (7)
Step ane
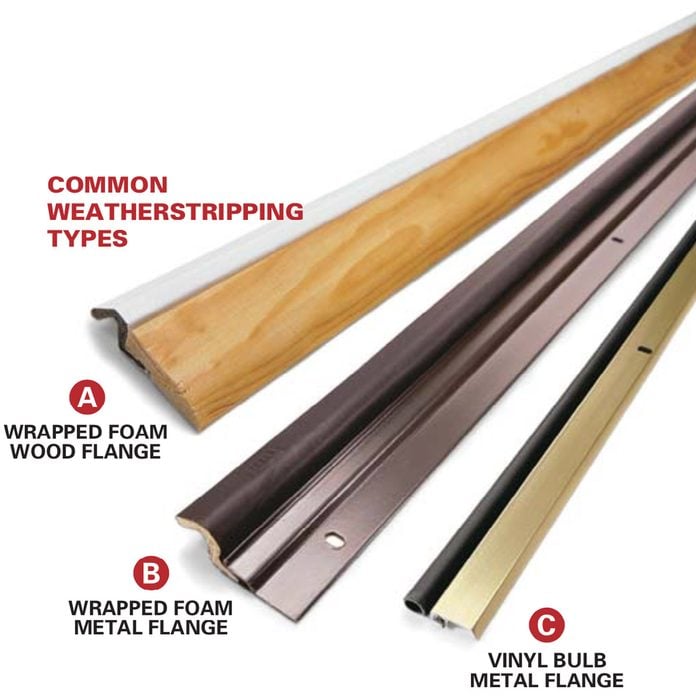
How to Buy Weatherstripping for Doors
- You can usually find the types of door weatherstripping shown hither at well-stocked hardware stores and habitation centers.
- Nosotros like the wrapped foam type (A and B, shown beneath). It'due south durable, retains its shape, withstands abrasions and conforms to a broad range of gaps.
- The metal flange with slots for screws (B) is a bit more adaptable than the blast-on wood flange type (A).
- The vinyl or silicone seedling blazon (C) won't cover wide gaps too as wrapped foam, simply information technology has a smaller contour with a cleaner await.
Pace ii
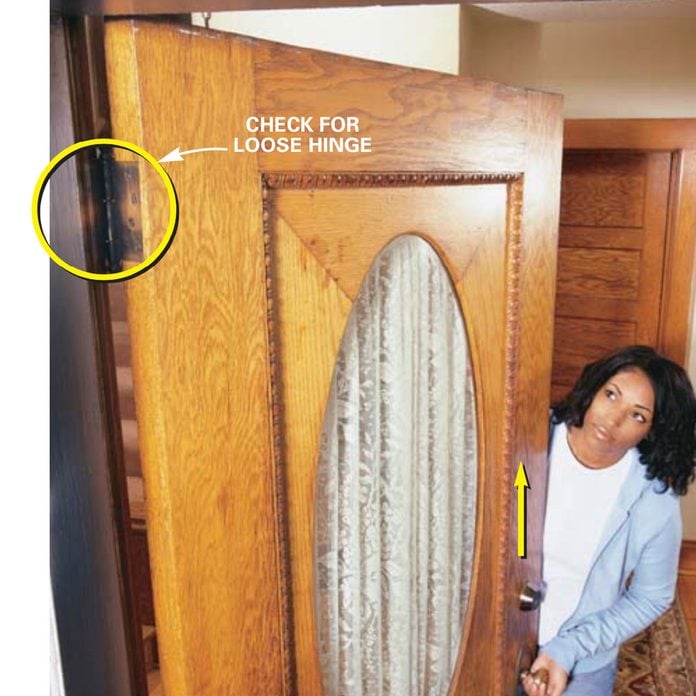
Tighten the Hinges
- Before you become out to buy your materials, cheque the door to make certain the draft isn't caused by loose hinge screws.
- Lift the door by the doorknob to check for loose hinges. If the door moves upward, tighten the top hinge screws. That might solve the draft problem!
- If the screws no longer seize with teeth, yous may have to glue wood plugs in the holes and re-bulldoze the screws.
![]()
Step 3
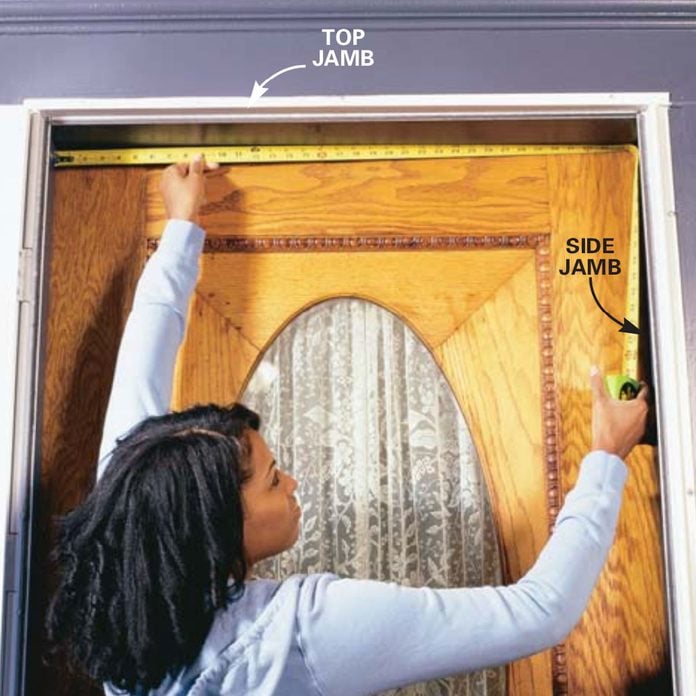
Measure the Door Jamb
- Close the door and measure the summit of the frame from side to side.
- Measure out the top of the door from the threshold to the top jamb.
Stride 4
Cut the Top Piece
- Cut the foam part of the door atmospheric condition stripping with sharp scissors.
- Next, cut the wood flange with a hacksaw or other fine-tooth saw.

Step 5
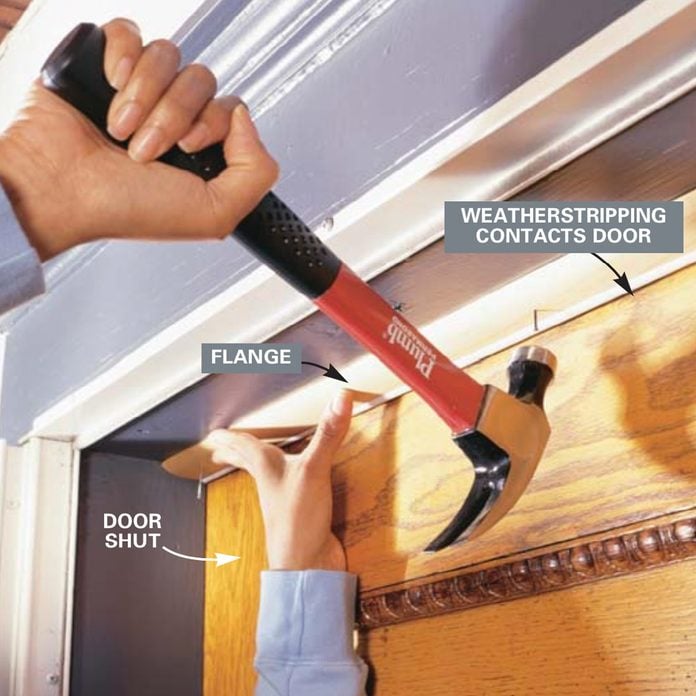
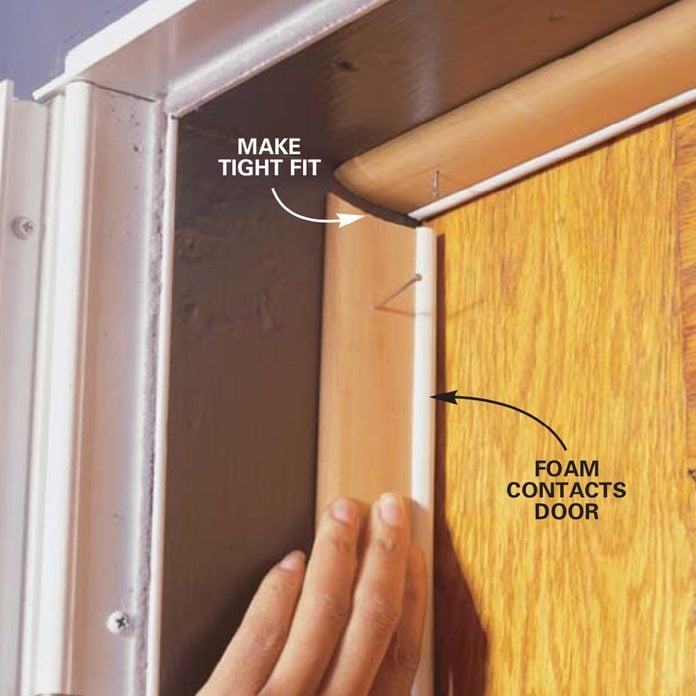
Nail the Elevation Piece
- Tap 1-1/two in. nails into the wood flange and position the weatherstripping so the unabridged length of the foam seals against the door.
- Tack the door weatherstripping in identify just don't drive the nails abode notwithstanding.
- Next, measure the length of the sides of the frame.
Footstep vi
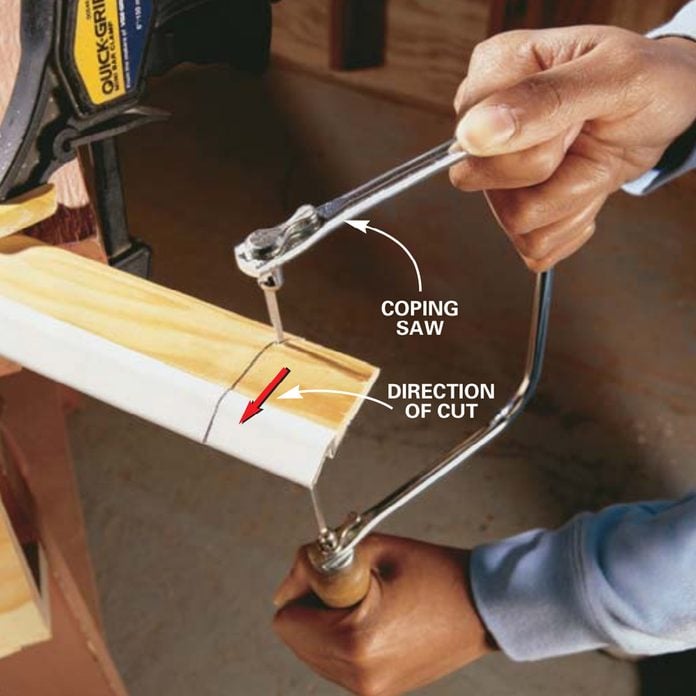
Cut the Side Pieces
- Mark the profile using a piece of flake for a guide.
- Cut the contour with a coping saw, cut the foam with a pair of scissors
- Cut one piece of weatherstripping for each side to fit the profile of the elevation piece.
- File or sand your cut for a tight fit. Then measure and cut the bottom to length.
Pace 7
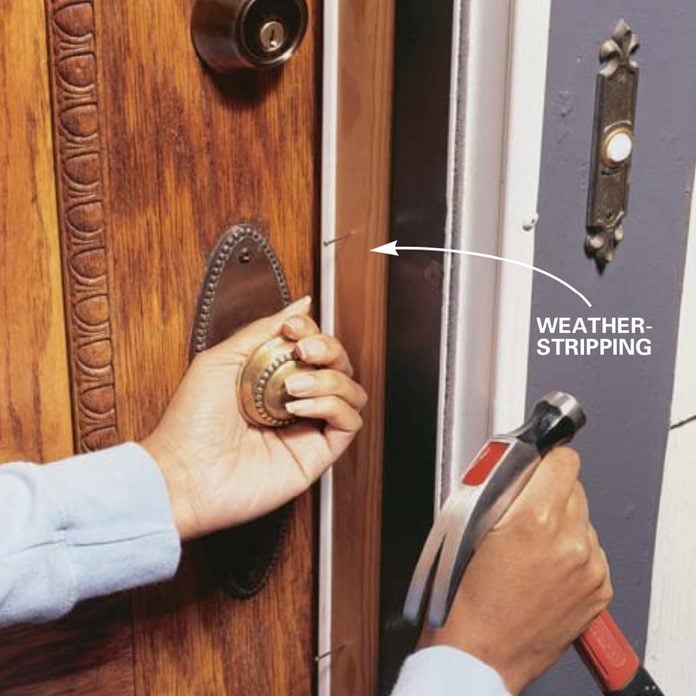
Adhere the Weatherstripping
- Position the door weatherstripping so that the unabridged length seals to the door and tack it in place. Position the nails about two in. in from each end (to avert splitting), and space others about every 12 in.
- Open and close the door several times to make certain the door weatherstripping seals against the door and the door latches and locks. Arrange the door weatherstripping equally needed., so bulldoze the cease nails abode.
- Pro tip: The key to positioning the new door weatherstripping is to shove it confronting the door then it compresses slightly forth its entire length.
Originally Published: December 31, 1969

How To Add New Weather Stripping Around Door,
Source: https://www.familyhandyman.com/project/door-weather-stripping/
Posted by: lohmanmrsed2001.blogspot.com
0 Response to "How To Add New Weather Stripping Around Door"
Post a Comment